Set up the GitHub MCP server
The GitHub MCP server gives AI agents access to GitHub repositories, issues, pull requests, Actions workflows, code security findings, and more. This guide walks through creating a GitHub App, copying credentials, and connecting the server to MintMCP as a remote MCP.
Prerequisites
- A MintMCP admin account
- A GitHub account with permission to create GitHub Apps
Create a GitHub App
-
Go to
github.com/organizations/YOUR-ORG/settings/apps/new(replaceYOUR-ORGwith your organization name). If you're registering under a personal account instead, go to github.com/settings/apps/new. -
Enter the app name and homepage URL:
Field Value GitHub App name MintMCP Org OAuth(or any name your team will recognize)Homepage URL https://app.mintmcp.com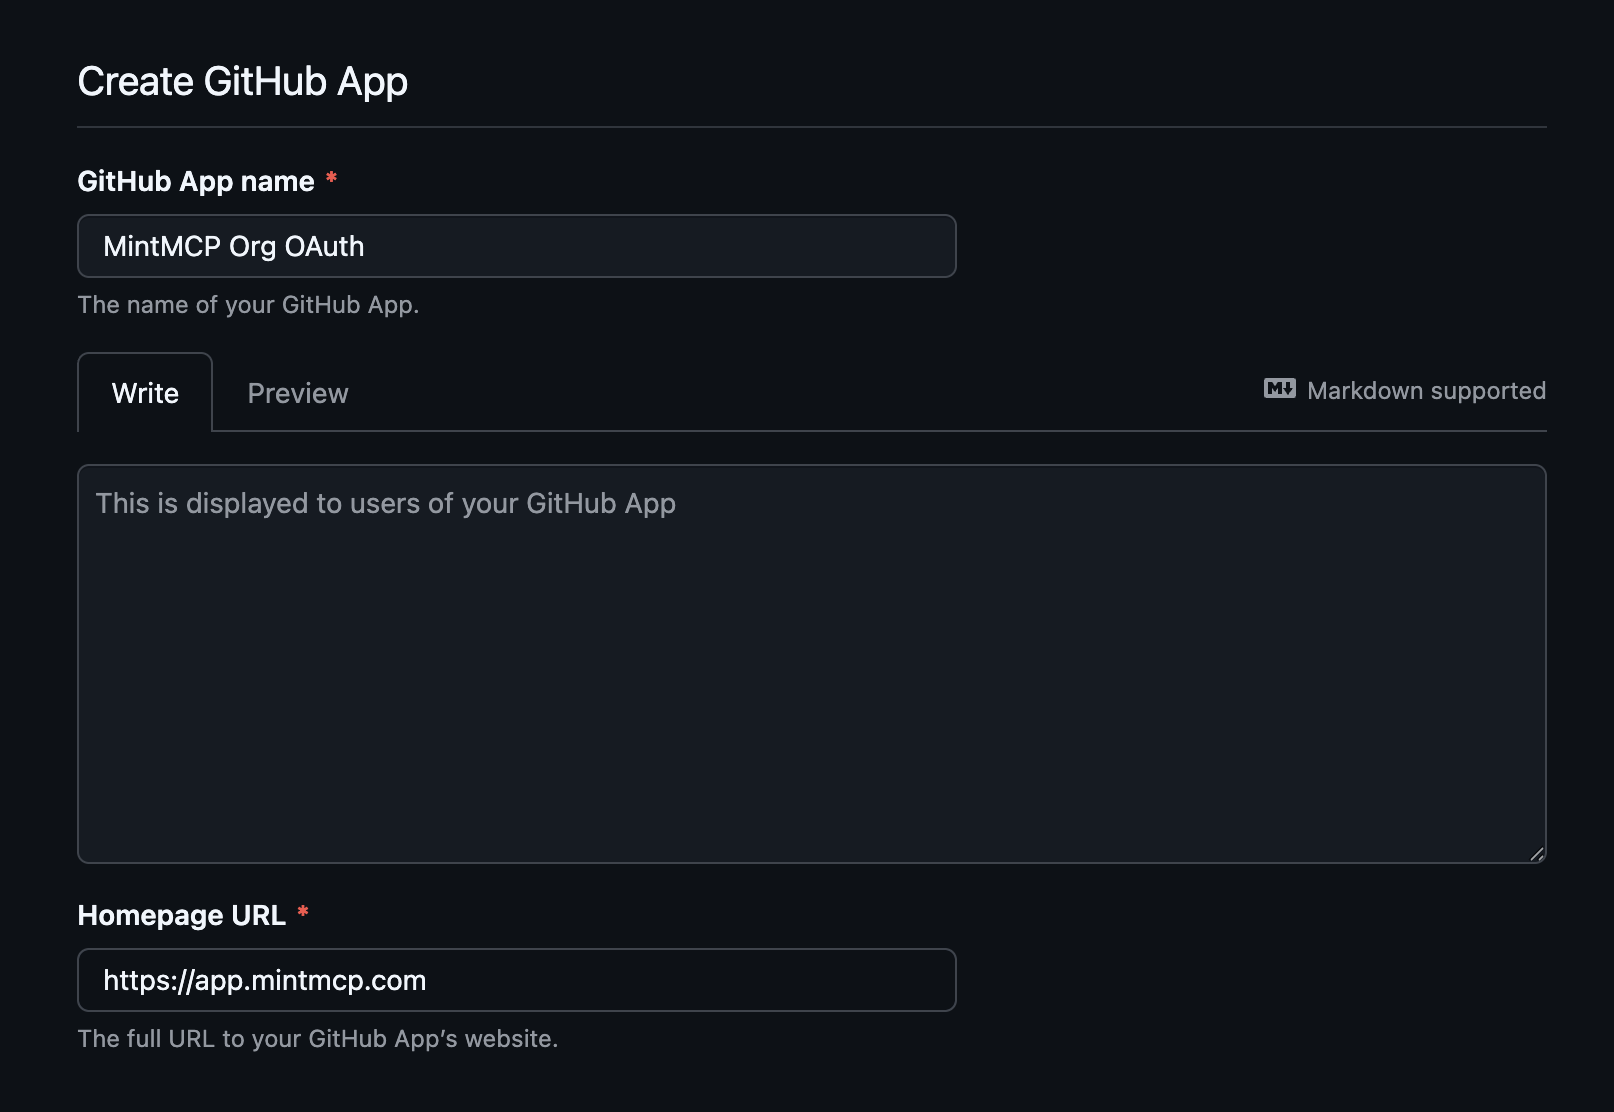
-
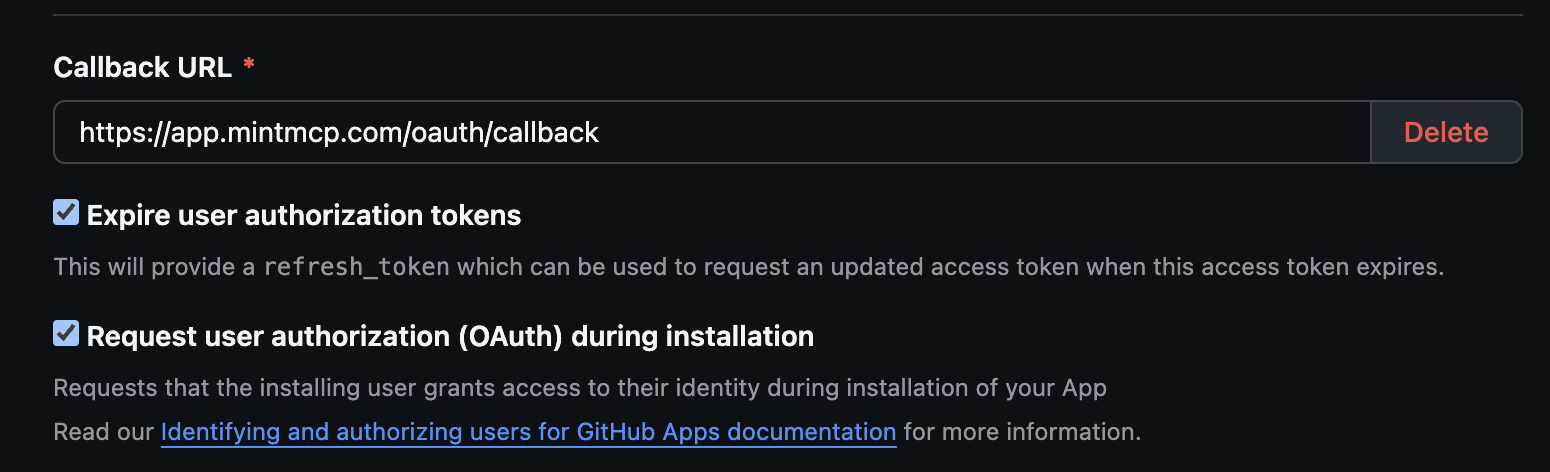
Set the Callback URL to
https://app.mintmcp.com/oauth/callback. -
Enable user authorization so members sign in with their own GitHub identity:
- Check Expire user authorization tokens to issue refresh tokens.
- Check Request user authorization (OAuth) during installation so GitHub runs the OAuth flow when a user installs the app.
-
Set the app's permissions to read-only access for the resources agents need:
Permission Access Administration Read-only Contents Read-only 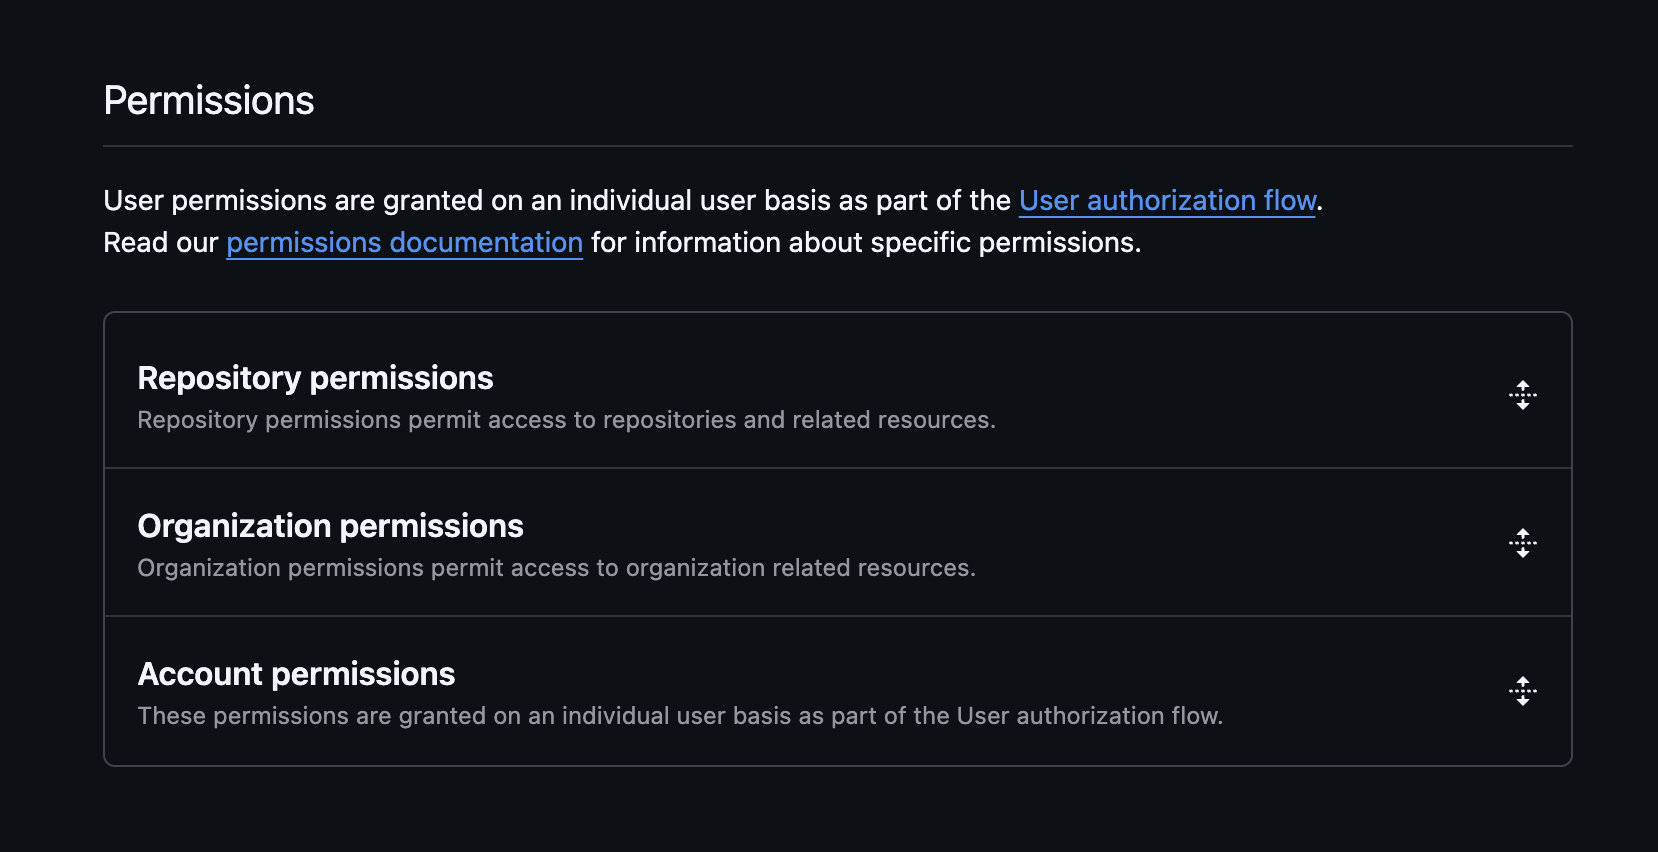


-
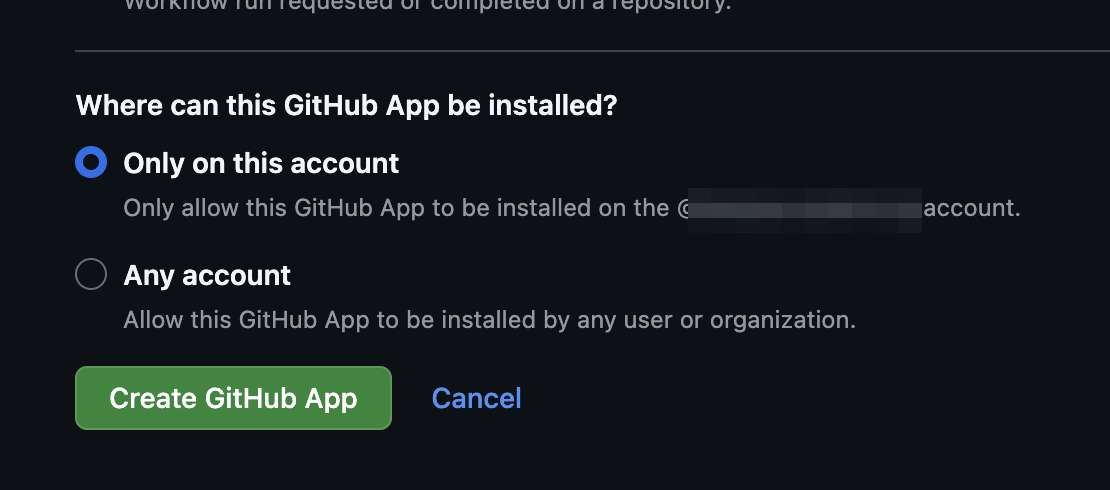
Under Where can this GitHub App be installed?, select Only on this account, then click Create GitHub App.
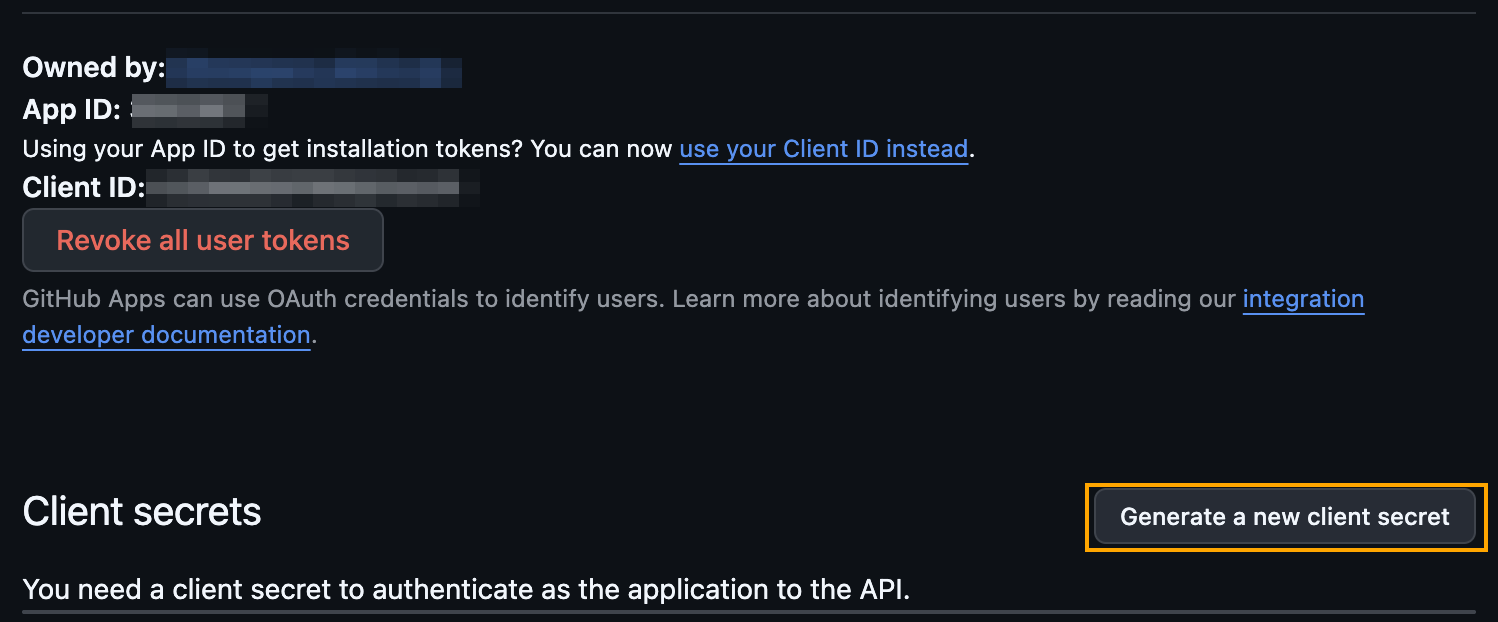
Copy the client ID and client secret
-
On the app's settings page, copy the Client ID.
-
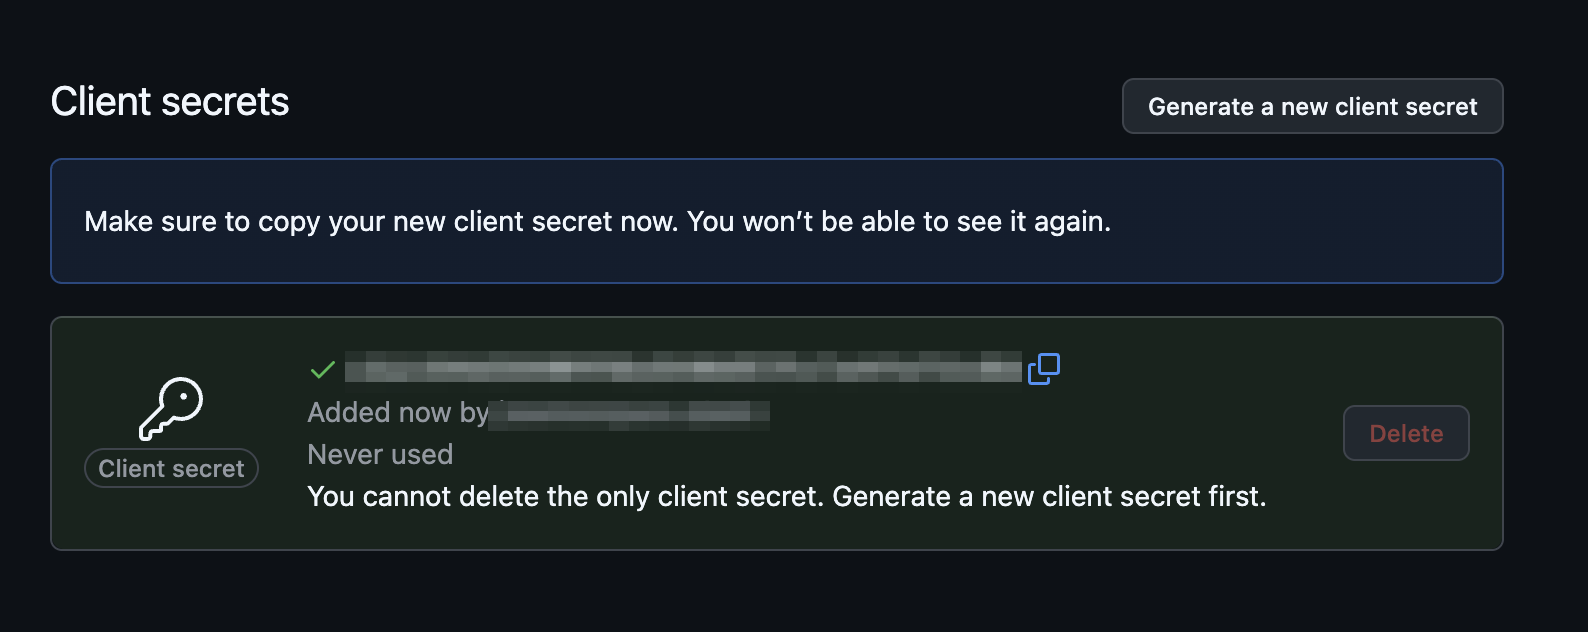
Click Generate a new client secret (highlighted above), then copy the secret immediately — you can't view it again after leaving this page.
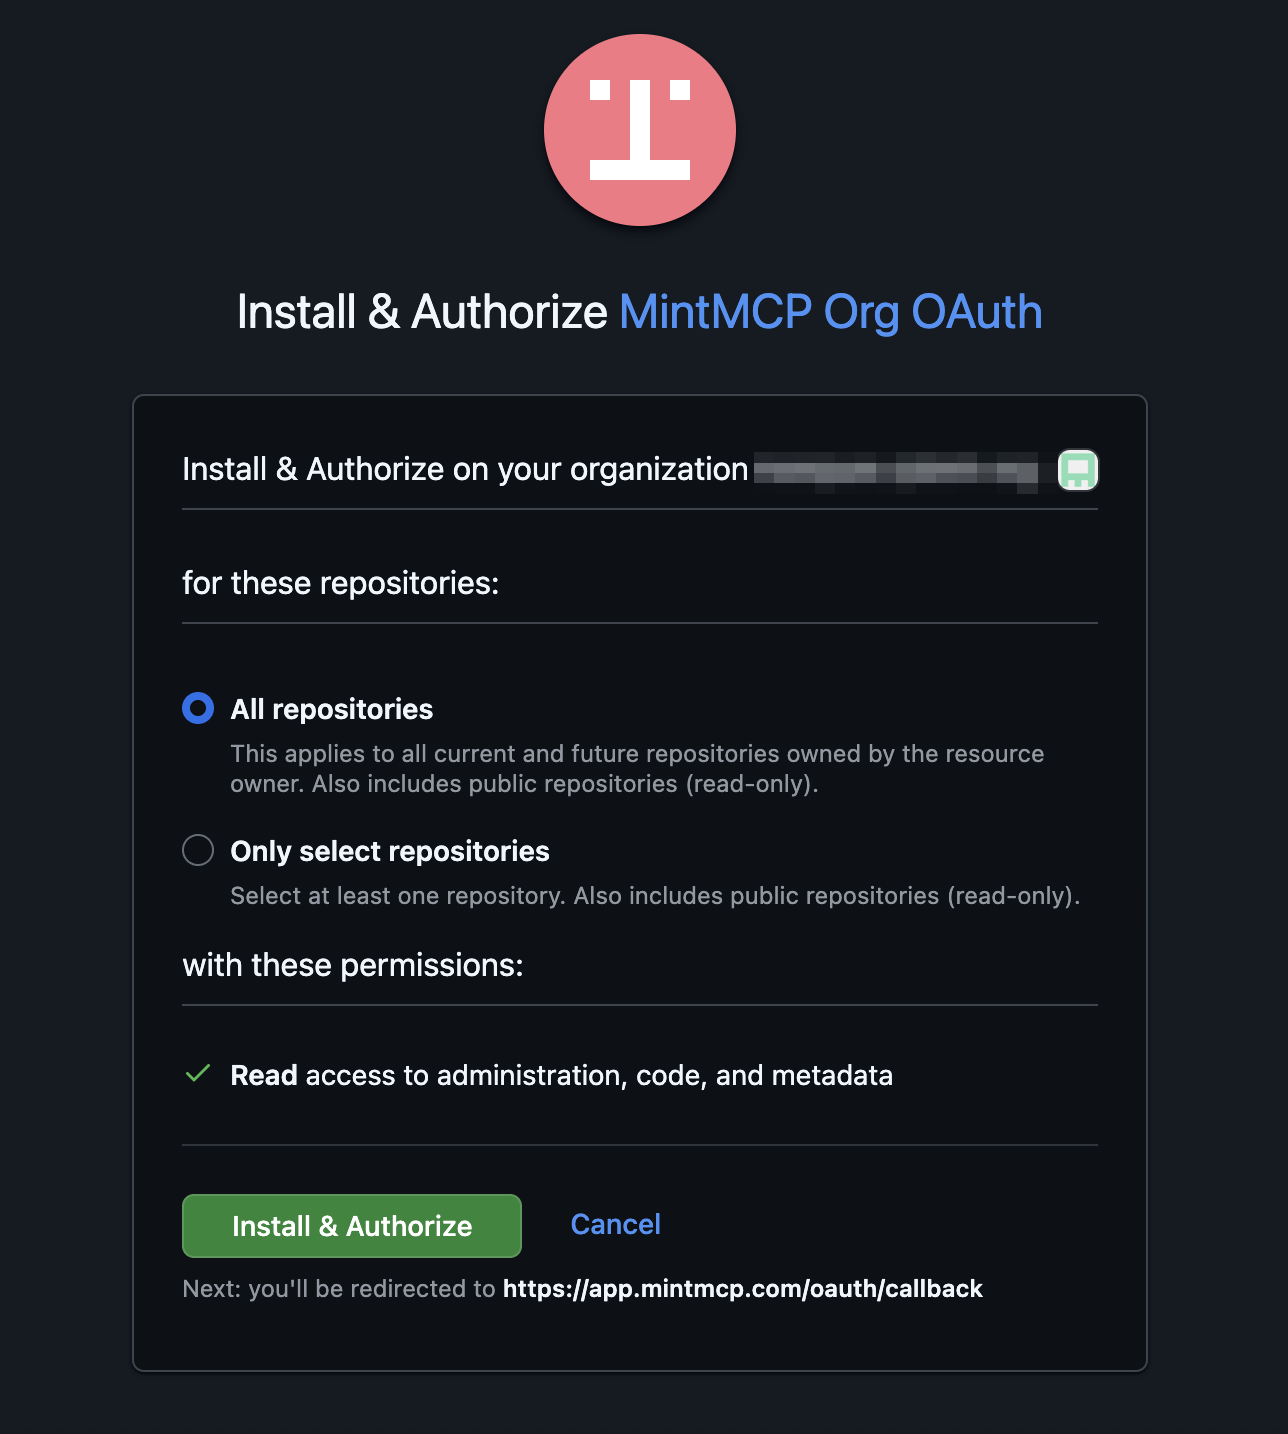
Install the app
Installing the app on your organization grants it access to the repositories agents will work with.
-
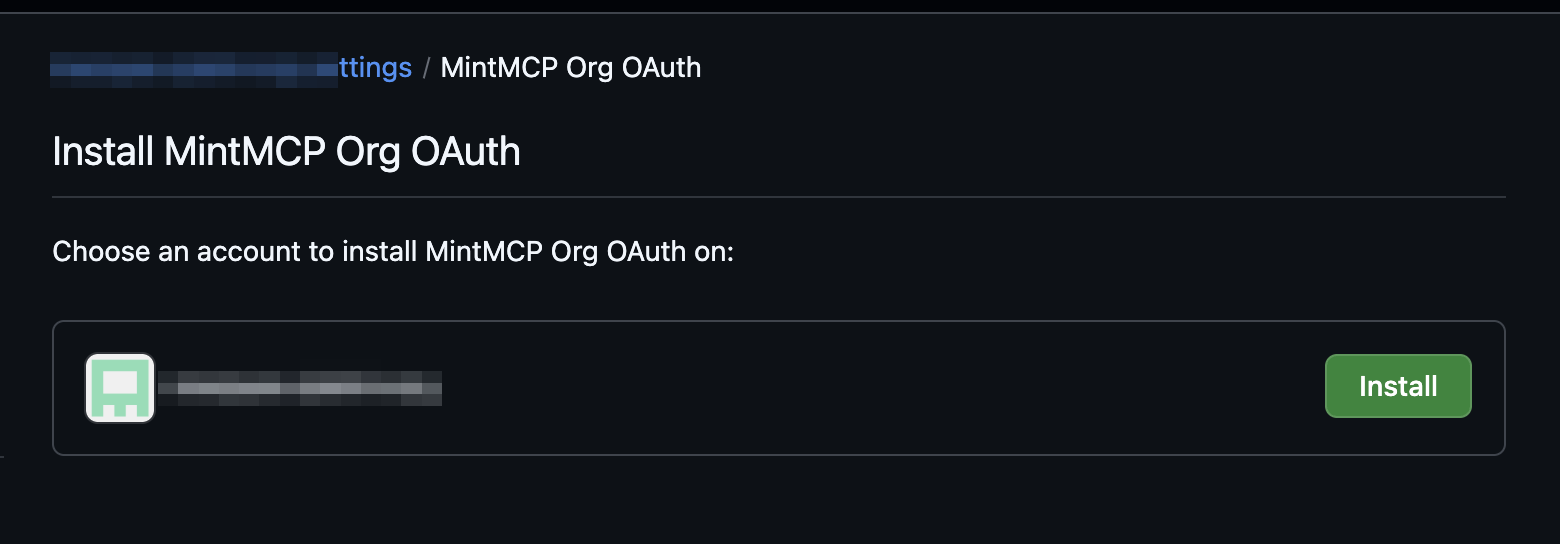
In the app's left sidebar, click Install App.

-
Next to your organization, click Install.
-
Choose which repositories the app can access, then click Install & Authorize:
- All repositories — the app can read every current and future repository in the organization.
- Only select repositories — the app is limited to the repositories you pick.
This is your decision: pick the scope that matches your organization's access policy. Most teams limit the app to only the repositories agents need.
Add GitHub to MintMCP
- In MintMCP, go to MCP store > Manage store.
- Click + Add an MCP to your registry → Connect to an MCP by URL.
- Enter the server URL:
https://api.githubcopilot.com/mcp/ - Set Connection type to Per-user credentials.
- Set Authorization method to OAuth.
- Open OAuth Client Advanced Settings and paste the Client ID and Client Secret from your GitHub App.
- Click Create.
Each team member authorizes with their own GitHub account on first use, so tool calls are tied to their individual GitHub identity and permissions.
Limit toolsets (optional)
By default, the server enables five toolsets: context, repos, issues, pull_requests, and users. To enable additional toolsets or restrict to a subset, append the toolset path to the server URL:
| Goal | URL |
|---|---|
| Default toolsets | https://api.githubcopilot.com/mcp/ |
| Enable all toolsets | https://api.githubcopilot.com/mcp/x/all |
| Specific toolsets | https://api.githubcopilot.com/mcp/x/repos,issues,actions |
| Read-only mode | https://api.githubcopilot.com/mcp/readonly |
Available additional toolsets: actions, code_security, discussions, gists, notifications, projects, secret_protection.
GitHub Enterprise
For GitHub Enterprise Cloud with data residency (ghe.com), use a different server URL when adding the remote MCP:
https://copilot-api.{subdomain}.ghe.com/mcp
Replace {subdomain} with your organization's subdomain (for example, octocorp for octocorp.ghe.com).
GitHub Enterprise Server does not support the remote MCP server — use the Hosted Connector deployment with the Docker image ghcr.io/github/github-mcp-server and a service account PAT instead.
Security considerations
- The OAuth client secret authorizes MintMCP to initiate GitHub's OAuth flow on your behalf — keep it secure and regenerate it if compromised.
- Each user authenticates with their own GitHub account, so tool calls are scoped to that user's repository access and permissions.
- Read-only mode prevents the server from making any write operations — use the
/readonlyURL suffix when agents should only query data. - For shared service accounts or GitHub Enterprise Server, use a fine-grained PAT with minimum required scopes (
repo,read:org) instead of OAuth.
Next steps
- Tool customization — Control which GitHub tools are exposed to users
- MCP gateway administration — Manage access and permissions