Set up the HubSpot MCP server
HubSpot's remote MCP server connects AI agents to your CRM with read and write access. This guide covers creating a HubSpot MCP auth app and installing the recommended HubSpot connector in MintMCP with the OAuth credentials it generates.
Prerequisites
- A MintMCP admin account
- A HubSpot account with access to the Development section — see Create an MCP auth app in HubSpot
- HubSpot's remote MCP server uses OAuth 2.1 with PKCE; MintMCP supports it natively
Create an MCP auth app in HubSpot
The MCP auth app is the HubSpot-side OAuth client that MintMCP uses to broker each user's sign-in. HubSpot issues a Client ID and Client Secret once you create it.
-
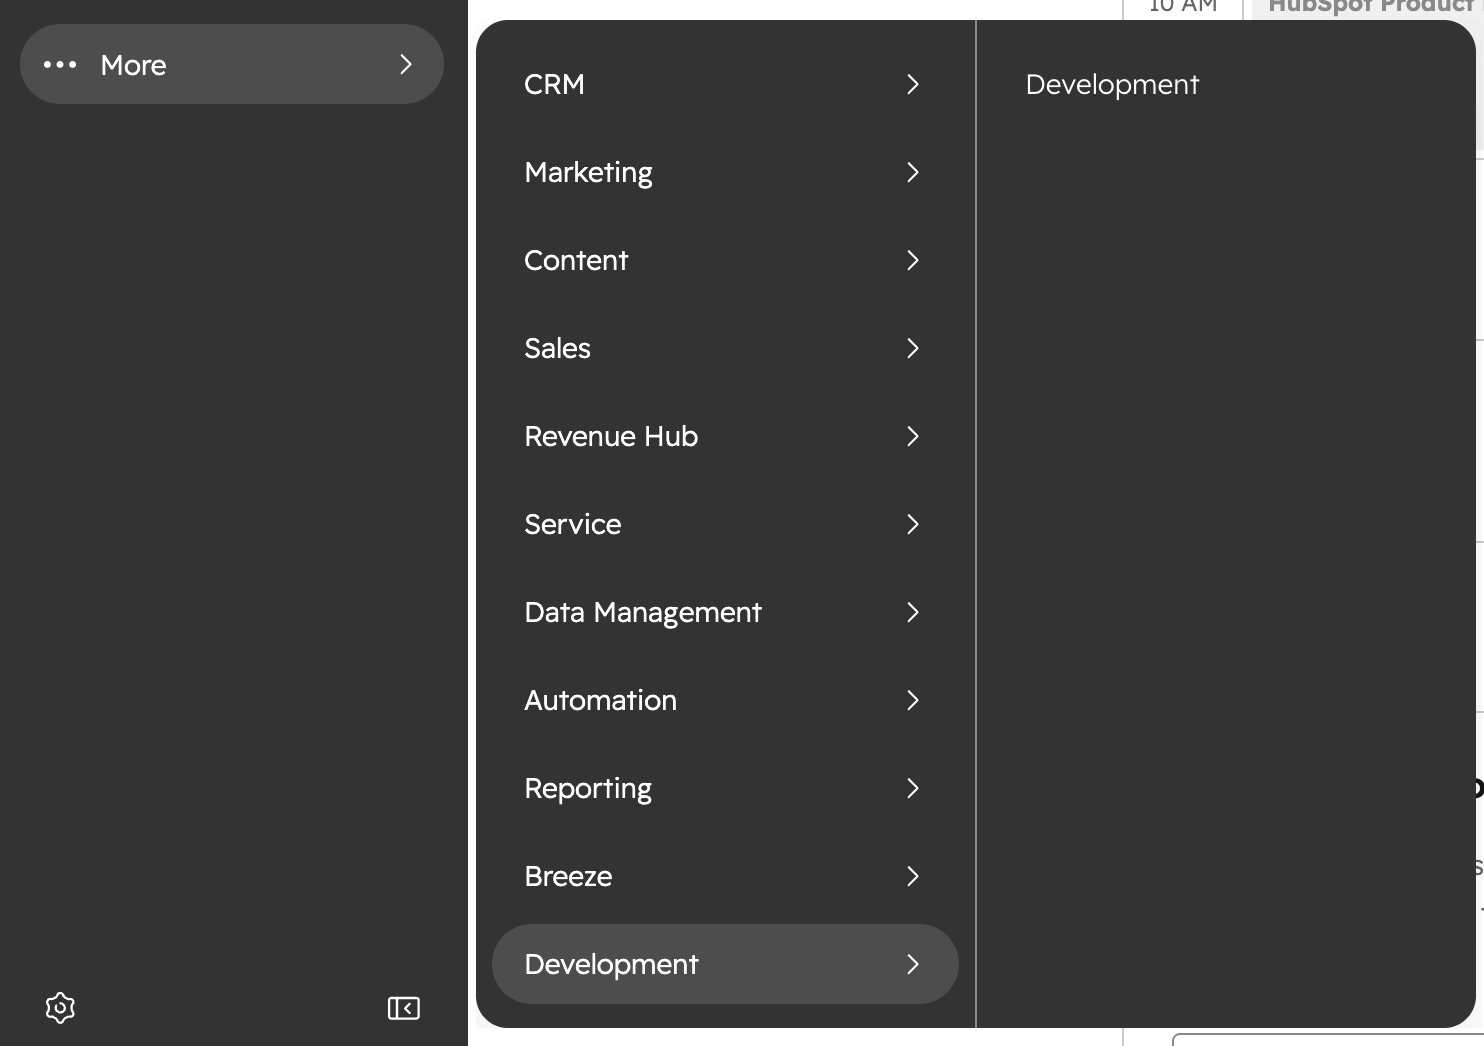
In your HubSpot account, go to More → Development.
-
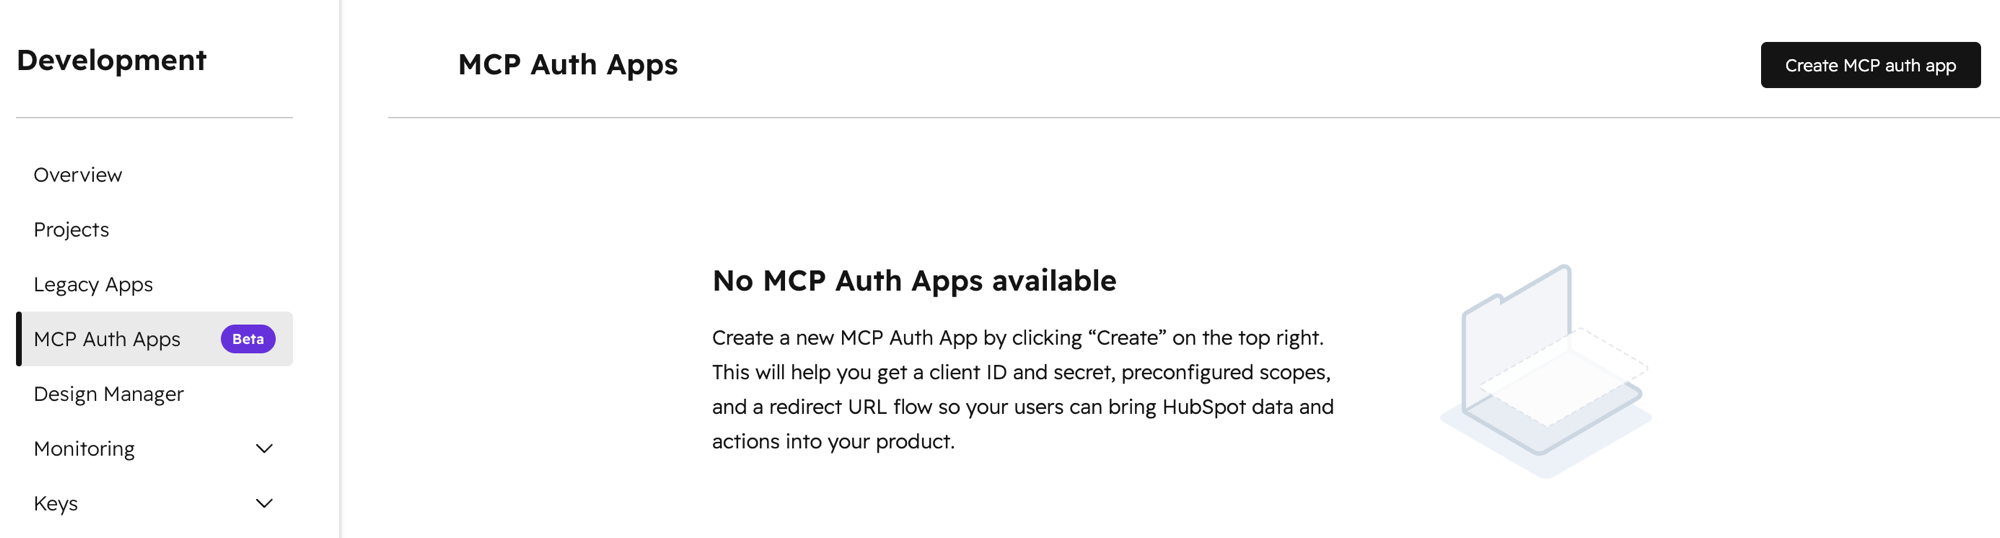
Open MCP Auth Apps, then click Create MCP auth app in the upper right.
-
Enter an App name (for example,
MintMCP). Description and Icon are optional. -
Set Redirect URL to:
https://app.mintmcp.com/oauth/callbackThis must match the Redirect URL in the connector's OAuth settings exactly, or sign-in fails with
redirect_uri_mismatch.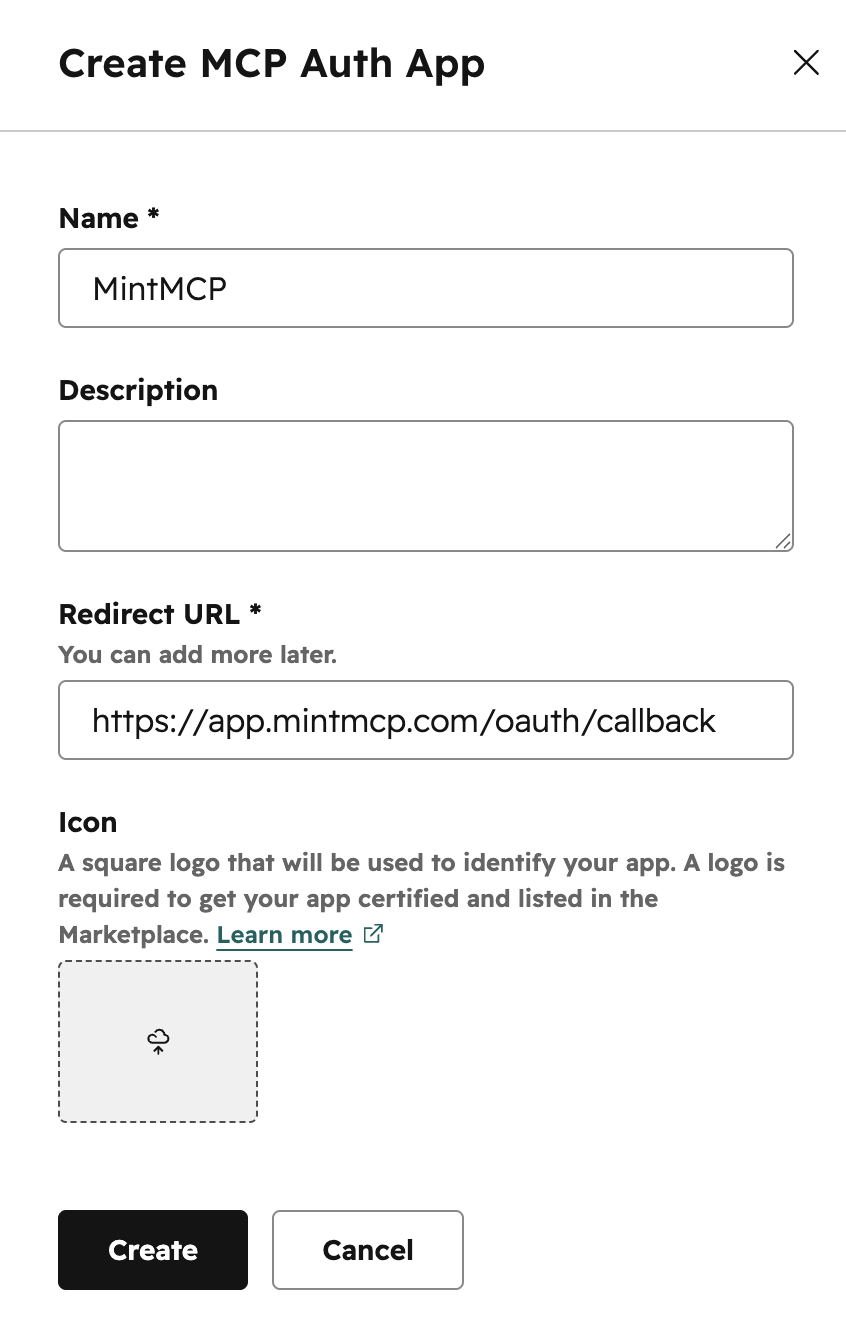
-
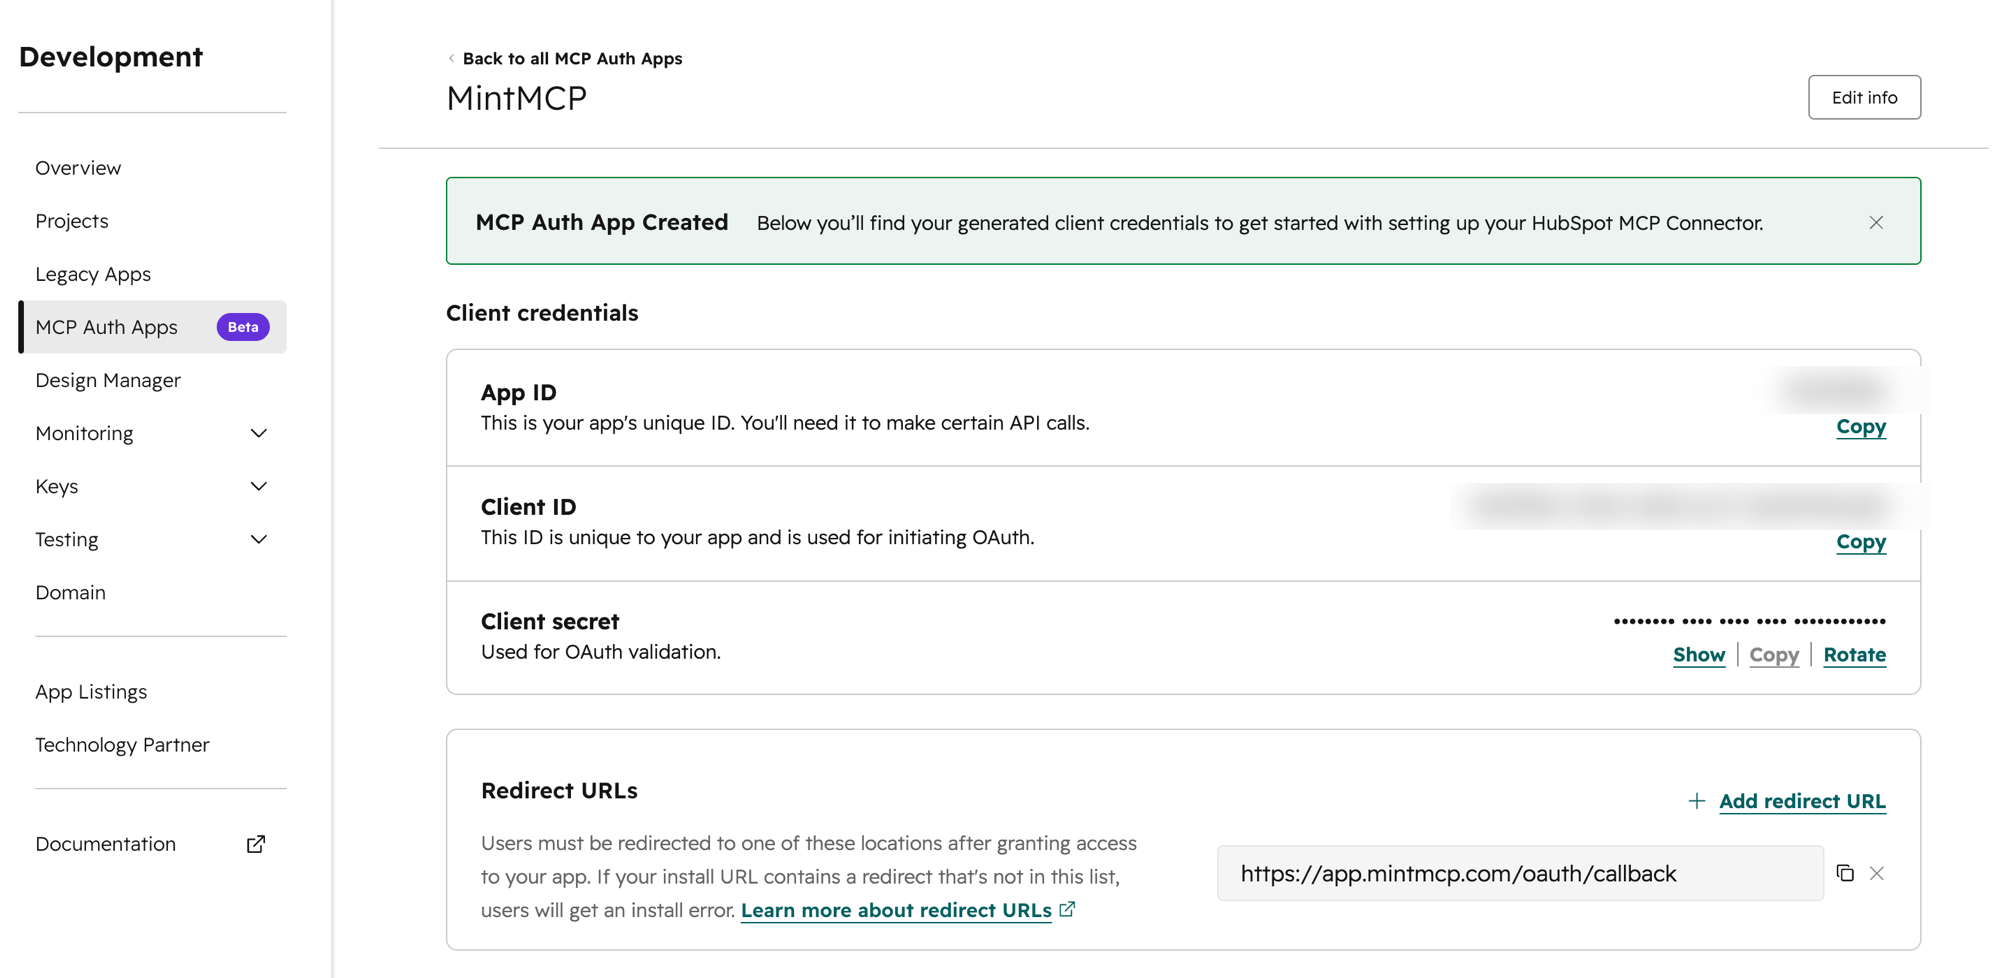
Click Create. HubSpot opens the app details page.
-
Copy the Client ID and Client Secret — you'll need both in the next section. Treat the secret like a password.
Tool capabilities reference
HubSpot determines available scopes automatically from the tools the MCP server exposes and the connected user's HubSpot permissions, so there's no explicit scope configuration on the MintMCP side. The connector surfaces both read and write tools — what each user can actually do is bounded by their HubSpot role.
| Capability | What it covers | Notes |
|---|---|---|
| Read | Contacts, companies, deals, tickets, users, line items, products, quotes, invoices, orders, carts, subscriptions, segments, activity history (calls, emails, meetings, notes, tasks), and marketing/content (campaigns, landing pages, blog posts, site pages, marketing events) | Available once OAuth is granted |
| Write | Contacts, companies, deals, tickets, line items, products, and the activity types above | Bounded by each user's HubSpot role |
Scopes don't grant access on their own — a user with the read or write surface still only sees and acts on records their HubSpot role already permits.
Add HubSpot to MintMCP
-
In MintMCP, go to MCP store → Manage store.
-
Find the HubSpot connector on the Recommended servers section and click to install it.
-
Open the connector's OAuth settings and enter:
Setting Value Client ID Client ID from the HubSpot MCP auth app Client Secret Client Secret from the HubSpot MCP auth app -
Confirm the Redirect URL shown in the connector's OAuth settings matches the one you set on the HubSpot auth app (
https://app.mintmcp.com/oauth/callback). They must be identical, or sign-in fails withredirect_uri_mismatch. -
Click Save.
The first time a user calls a tool, MintMCP directs them to sign in with HubSpot and consent. MintMCP stores and refreshes their token automatically on every subsequent call.
Security considerations
- Each user authenticates individually through OAuth, so tool calls run under that user's HubSpot identity and are limited by their existing HubSpot permissions.
- The Client Secret grants OAuth access to your HubSpot CRM data — keep it out of version control and restrict who can view it in MintMCP.
- HubSpot accounts with sensitive-data features enabled block activity objects (calls, emails, meetings, notes, tasks) from MCP access.
- Write tools are governed by each user's HubSpot role — users can't create or modify records they couldn't already touch in HubSpot directly.
Troubleshooting
- OAuth callback fails with
redirect_uri_mismatch— confirm the auth app's Redirect URL is exactlyhttps://app.mintmcp.com/oauth/callbackand matches the connector's OAuth settings. - Write tools return a permissions error — the connected user's HubSpot role lacks edit access on that object type, or the account has sensitive-data restrictions in place for activity objects.
Next steps
- Tool customization — Control which HubSpot tools are exposed to users
- MCP gateway administration — Manage access and permissions