Set up the Datadog MCP server
The Datadog MCP server lets AI agents retrieve observability data — logs, metrics, traces, monitors, dashboards, incidents, and more — directly from your Datadog account. This guide covers enabling MCP at the Datadog organization level, granting users the required role permissions, and connecting the server to MintMCP using per-user OAuth.
Prerequisites
- A MintMCP admin account
- A Datadog account. Government sites (app.ddog-gov.com, us2.ddog-gov.com) are not supported.
- A Datadog admin to enable MCP at the organization level — see Enable MCP for the organization below.
- Users who will access MCP tools need
mcp_readon their Datadog role — see Grant MCP role permissions below.
Enable MCP for the organization
MCP is gated by two org-level toggles in Datadog. They apply to every user regardless of role, so an admin needs to enable MCP Access (and optionally MCP Write Access) before anyone can use the MCP server.
-
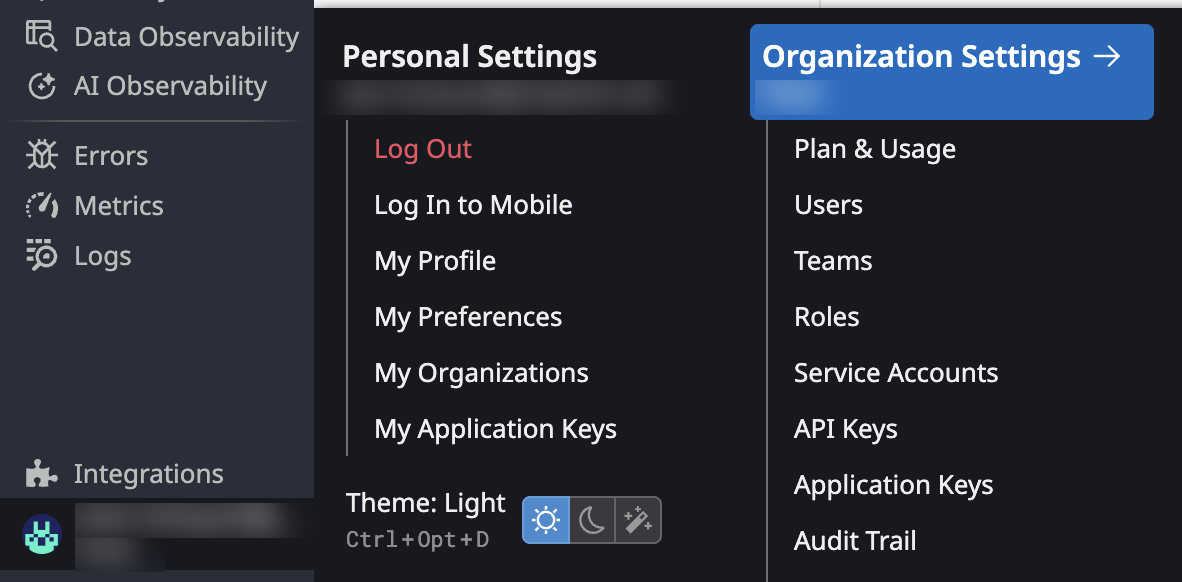
In Datadog, click your profile in the bottom-left sidebar and open Organization Settings > Preferences (direct link).
-
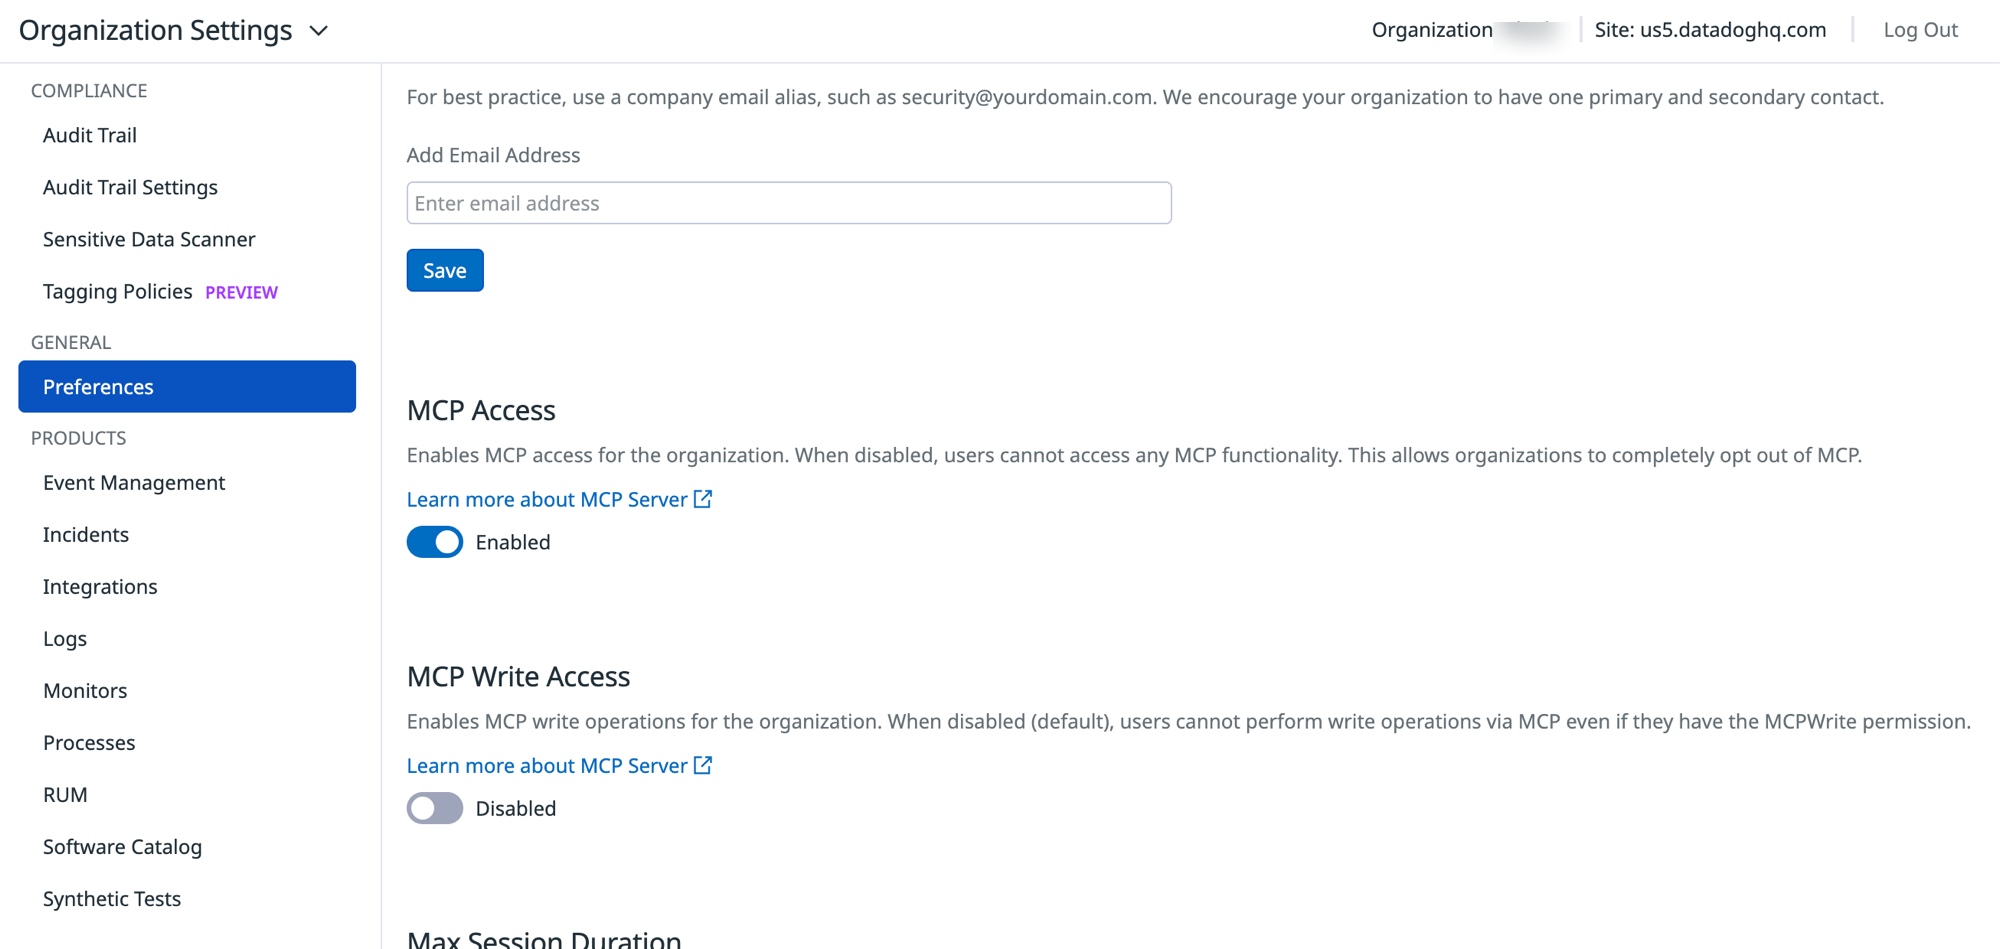
Set the MCP toggles:
- MCP Access — enable to allow MCP usage across the organization.
- MCP Write Access — enable only if users need to create or modify Datadog resources through MCP. Defaults to off; leave it off for read-only access.
Grant MCP role permissions
Every Datadog user who will use the MCP server needs mcp_read on their role. Users on the Standard Role already have both mcp_read and mcp_write by default — no action needed for them.
For users on the Read Only Role or a Custom Role:
-
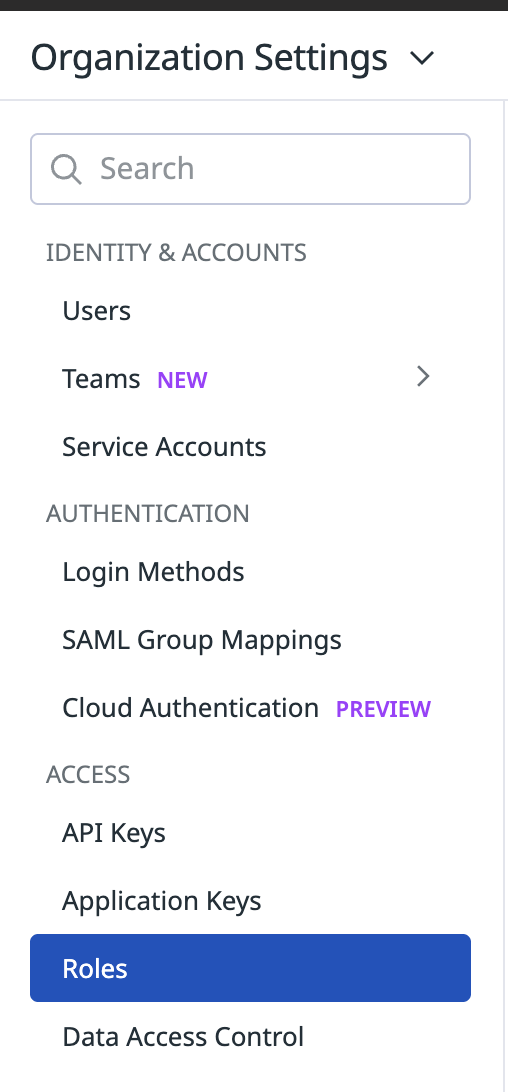
In the Organization Settings sidebar, select Roles under ACCESS (direct link).
-
Find the role you want to update and click the Edit (pencil) icon.

-
Under Permissions, search for
mcpand enableMCP Read. EnableMCP Writetoo if users on this role need to create or modify Datadog resources.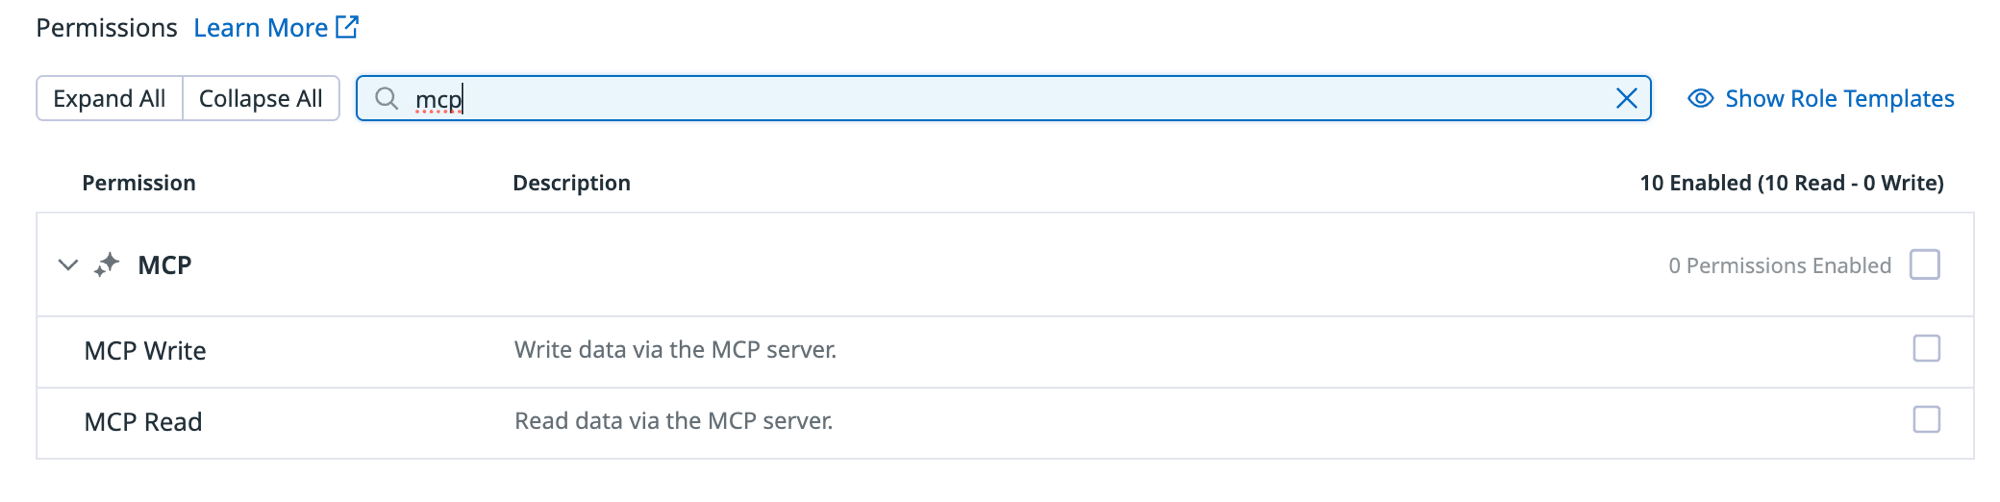
-
Click Save.
MCP permissions reference:
| Permission | What it unlocks | Who needs it |
|---|---|---|
mcp_read | Read-only tools: query monitors, search logs, retrieve dashboards, list services | All users |
mcp_write | Write tools: create monitors, mute hosts, modify dashboards | Users who need to make changes |
MCP permissions don't grant access on their own — they unlock the MCP surface on top of whatever Datadog access the user already has. A user with mcp_read but no access to a specific monitor still cannot read that monitor through the MCP server.
Add Datadog to MintMCP
-
In MintMCP, go to MCP store > Manage store.
-
Click + Add an MCP to your registry → Connect to an MCP by URL.
-
Enter the Datadog MCP server URL:
https://mcp.datadoghq.com/api/unstable/mcp-server/mcp?toolsets=all -
Set Connection type to Per-user credentials.
-
Set Authorization method to OAuth.
-
Click Create.
Security considerations
- OAuth attributes activity per user — each user operates with their own Datadog identity, so Datadog's audit log reflects who ran each tool.
- Permissions follow the user — a user can only see and act on what their Datadog role allows. MintMCP does not elevate access.
- Grant
mcp_writeonly to users who need to create or modify Datadog resources.mcp_readonly is safer for general AI access. - The Datadog MCP server enforces rate limits of 50 requests per 10 seconds per user, 5,000 calls per day, and 50,000 calls per month. Contact Datadog to request higher limits.
Troubleshooting
- Tools missing from the list — confirm the user has
mcp_readand that the server URL includes?toolsets=all. - Write tools fail with a permissions error — the user is missing
mcp_writeor lacks resource-level permission on the target object.
Next steps
- Tool customization — Control which Datadog tools are exposed to users
- MCP gateway administration — Manage access and permissions